WooCommerce
Guide for installing Paymob's WooCommerce plugin for WordPress supporting our payment methods (Visa / Mastercard, NIFT, and EasyPaisa)
Installation:
- Open Plugins page:
● Browse to your WordPress admin panel → Plugins → Add New.
- Adding the plugin:
● Click “Upload Plugin” then “Choose File”.
● Browse your file system, choose the plugin in “.zip” format and click “Install Now”.
● Click “Activate Plugin” after it is successfully installed.
- Enable payment methods:
● Browse to WooCommerce → Settings → Payment
● You will find new Payment methods “Visa / Mastercard, NIFT, and EasyPaisa”
- Linking your Paymob account data:
● Choose the desired payment method by clicking “Manage”
● Fill in account following inputs first:
a- “API Key”, you can find it in your Accept dashboard, profile tab.
b- “HMAC Secret”, you can find it in your Accept dashboard, profile tab.
● A success message will appear if the correct data is entered.
- Setting the callback URLs:
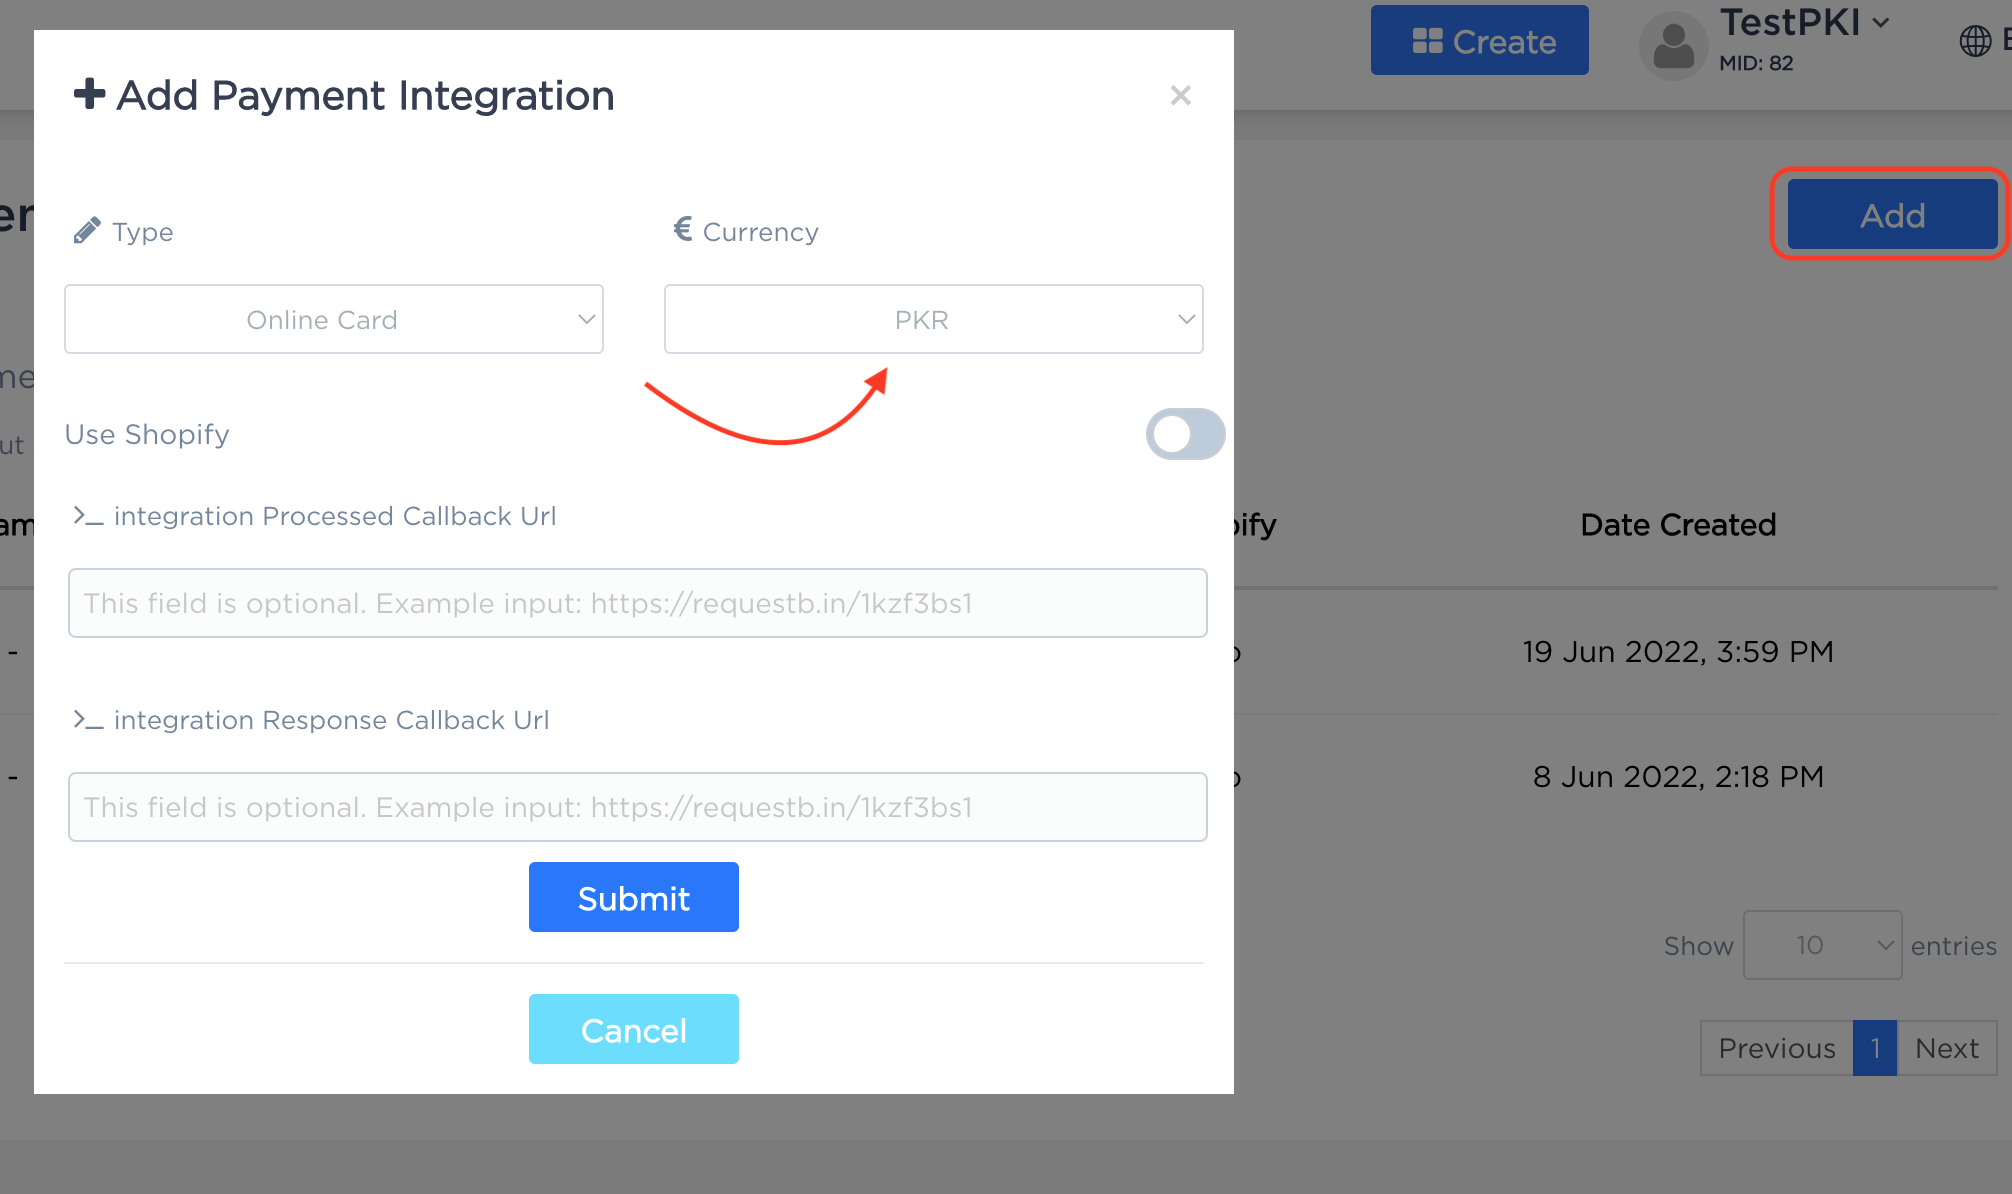
● Head to the Payment integrations page in Accept dashboard and click “Add”.
● Choose the payment method needed and the currency. Please make sure that the
currency is the same as the WooCommerce currency.

● Set the transaction processed and transaction response callback URLs as shown below
- Make sure to copy any of the two links
● Then you can navigate to Paymob's Dashboard → Developers Tab → Payment integrations→then click on the desired Integration and then press the "Edit" button and the below screen will open.
- so now you paste the callback URL that you copied into both Transactions Processed and Response Callback fields.
- Configure the payment integration.
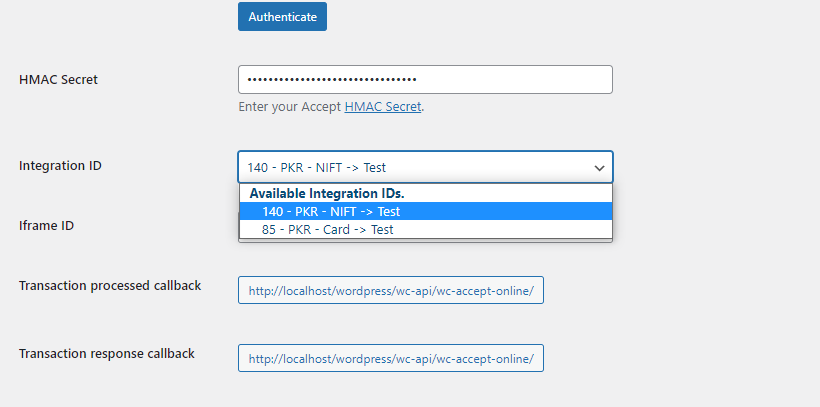
● Head back to WooCommerce admin and reload the page in order to refresh the list of
integration IDs.

● Select the integration ID and configure it to be displayed on the checkout page
- Configure the Iframe:
● For Visa / Mastercard and NIFT payments, you will need to choose the ID of the iFrame that will be displayed to the paying customer.
● For EasyPaisa there is no need for an iframe, and you will have no iframe field in the module configuration as it's not required.
● Head to the Iframes page in the Paymob dashboard to view the pre-created ones.
● Choose the ID then click “Save changes”
Updated 8 months ago
You can use the following link to access the test credentials for the supported methods: